Film Scanning Camera Settings: Set Exposure from RAW, Not the Histogram
The short answer
When you scan film with a camera, fix ISO, aperture and white balance, and set the exposure with shutter speed alone. Aim for the brightest exposure at which the film base (the clear strip between frames, where nothing was exposed) still doesn't clip in the RAW file.
The catch is that your camera's histogram and highlight warnings can't show you where that point is. On most cameras they are drawn from the JPEG, not the RAW, and the two can sit several stops apart. Check the limit in the RAW values of the frames you shoot.
This guide is written by the person who builds Loupe, an app for camera scanning. It covers colour negatives only, not black-and-white negatives or slide film.
What exposure changes in the final image
You invert a frame and find fine magenta and green specks across the sky. The inversion settings that worked on your last roll don't work on this one. Problems like these can come not from the inversion software, but from the exposure you scanned at.
Too dark, and colour specks appear in the highlights
A colour negative is tinted orange across the whole film (the orange mask). The orange holds back blue and green light, so less light reaches the sensor's blue (B) and green (G) channels than its red (R), and blue gets the least of all.
The light is shortest in the densest parts of the negative, which become the brightest parts of the final image, such as the sky. If the exposure is too low, sensor noise sits on top of that faint signal and stays behind as specks of colour once you invert.
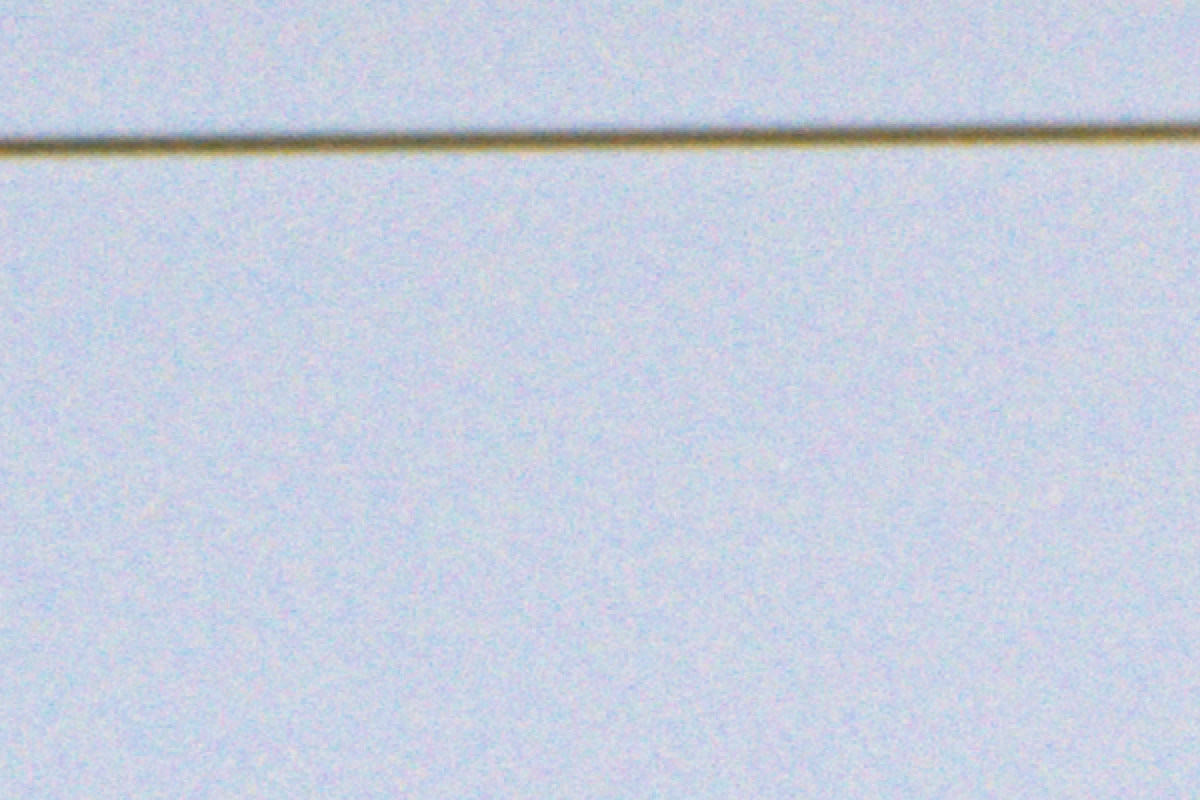
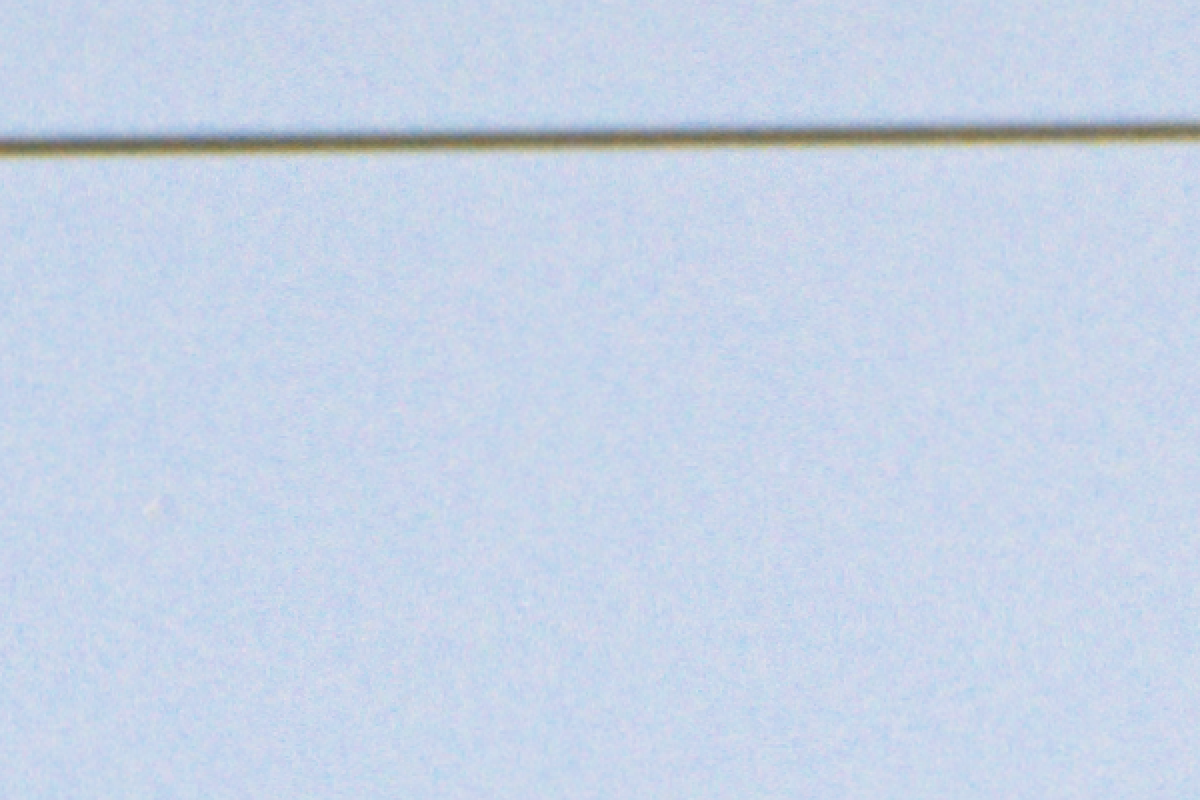
These two come from the same negative, shot once at the camera's auto-exposure and once 1.6 to 2 stops brighter. At auto-exposure, less than a third of what the sensor can record was being used. Shot brighter, the share of sky pixels showing colour specks fell from about 14% to under 1%. The shadows (the thin parts of the negative) barely changed in either.
Too bright, and the colour won't settle
Go the other way and push the exposure until the base clips, and a different problem starts.
Most inversion software takes out the orange mask using the colour of the base as its reference. If the base clips, that reference is off, and the inverted colour takes on a cast. The thin parts of the negative close to the base, which become your shadows, lose their tone along with it.
Shoot right at the clip point, and a small change in the brightness of your light can shift the colour from one frame to the next. So rather than going all the way to the clip point, leave a little room.
The camera can't show you the limit
On most cameras, the histogram and zebras you check before the shot, and the highlight warning on playback, are drawn from the image the camera has rendered for the JPEG. So when they say something has clipped, it is the JPEG that has clipped. They can't tell you whether the RAW has.
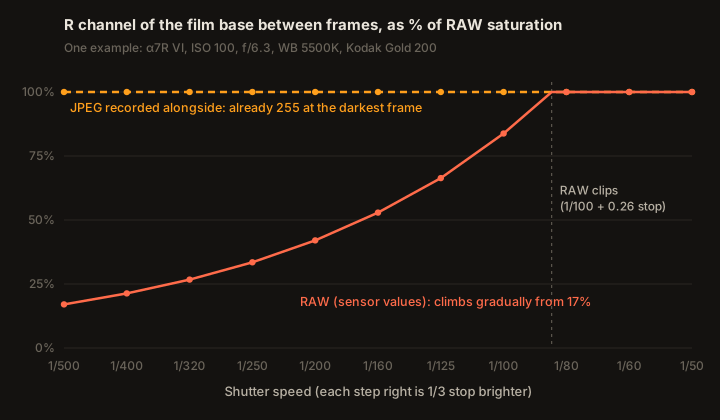
The chart above comes from shooting the base 1/3 stop brighter each time and comparing the red (R) values of the RAW and of the JPEG recorded alongside it.
- The JPEG red was already at its 255 ceiling in the darkest frame
- The RAW red only clipped more than 2.5 stops brighter than that
So in this example, stopping as soon as any of the JPEG's R, G or B channels reaches 255 leaves you more than 2.5 stops darker than the RAW limit. And if you go by G or B alone, the RAW red clips. How far apart the two sit depends on the camera and its settings.
The camera's meter won't give you the limit either. A meter is built to place whatever it measures at a middle tone. Follow it, and you tend to stop well short of the sensor's ceiling.
How to set the exposure by hand
1. Fix your settings
Shoot RAW in manual exposure mode. Set ISO to your camera's base ISO and leave it there.
Fix the aperture too. Choose the aperture where your lens resolves best, usually somewhere around f/6.3 to f/8. Stop down further and diffraction softens the image. As long as the film sits flat in its holder, apertures in this range give you enough depth of field.
Set white balance to a fixed value, not auto. On auto, the value shifts with whatever is in each frame, and the colour of the images you hand to your inversion software won't stay consistent.
2. Wait for your light to settle
An LED light source changes brightness for a while after you switch it on. Give it time, and wait until the brightness settles.
When you have time, it's worth shooting RAW every five minutes once to find out how long your own light takes to settle. After 25 minutes, the author's LED panel barely moved across six-minute intervals. Even so, on another day it brightened by about 0.1 stop over 25 minutes. That is part of why step 4 leaves some room.
3. Shoot the base in 1/3-stop steps
Place the film base between two frames at the centre of the image. Depending on the light and the lens, the edges of the image can come out darker than the centre, so measuring at the centre is the safe choice.
Start from your camera's auto-exposure setting and change only the shutter speed, 1/3 stop at a time, until you are about three stops brighter. In the author's example, the limit was around two stops brighter than auto-exposure.
4. Pick the brightest frame that doesn't clip in RAW
Open the RAW files in a tool that can read the raw values themselves. The histogram in a raw developer shows values after white balance and a tone curve, so it won't do for this.
Tools that can read them include RawDigger (paid, with a trial) and FastRawViewer (paid, with a trial). If you can write code, the free rawpy can read them too.
Find the brightest frame in which none of R, G or B in the base has clipped. For the real scans, use an exposure 1/3 stop darker than that. The brightest frame can have almost no room left before clipping. Many raw developers treat a value a little below the true clip point as white, and your light will still drift a little.
For the first few frames, check the RAW of the image area as well. Depending on where the base was measured and how the light behaves, part of the image can still clip. If you find clipping, go 1/3 stop darker.
5. Shoot the whole roll at one exposure
Shoot the whole roll at the exposure you settled on. Don't change the exposure from frame to frame.
6. Start again for a new film stock or a new day
Where the base clips depends on the film stock, the light and the camera. Even with the same light, the brightness can change from day to day. When the stock or the day changes, repeat steps 3 and 4.
Where doing it by hand gets hard
None of these steps is difficult on its own. But once you do it roll after roll, a few things take real effort.
- Measuring again for every roll: each new stock and each new day means shooting the base several times, then opening the RAW files in a separate tool to read the values
- No way to see drift while you shoot: if your light changes noticeably partway through, the camera's display won't tell you
- No way to know a frame clipped until you're done: if part of an image clips, the camera's display won't show it while you shoot. You find out afterwards, when you check the frames in a tool that can read RAW
Loupe does these steps while you shoot
Loupe is a macOS tethering app for scanning film with a SONY camera. It handles the hard parts of the steps above as part of the shoot. It works with SONY cameras supported by the Camera Remote SDK (list of supported models) on a Mac with Apple silicon (macOS 14.1 or later). Shoot RAW, uncompressed or lossless compressed. Loupe's job ends at capture; you still invert your negatives in your usual inversion software.
- Measuring the base: draw a box over the base in the live view, and Loupe steps the shutter speed in 1/3-stop increments and reads that box in RAW. It works out where clipping begins in the RAW and recommends an exposure that leaves 0.15 to 0.4 stop of room before it
- Per roll, in today's light: there are no film-stock presets. Loupe measures once per roll, in the light you have that day
- Watching for drift: the room left in the recommended exposure absorbs small drift, and Loupe warns you when the RAW values of the frames you shoot are more than 1/3 stop off
- Checking every frame: Loupe checks the RAW of every frame in the background and marks the thumbnail of any frame where clipping passes a threshold
With Loupe too, place the base at the centre of the image before you box it. Loupe also set the brighter exposure in the sky comparison in this guide.
Common misconceptions
Can't I just shoot at what the meter says (±0)?
A meter places what it measures at a middle tone. In the author's example, auto-exposure used less than a third of what the sensor can record. And because a meter reads the brightness of the image in the frame, its result changes with what the frame shows.
Isn't one stop back from the right edge of the histogram safe?
The camera's histogram reads the JPEG, so its right edge is already out of step with the RAW limit. In this guide's example, the gap was more than 2.5 stops. One stop back is not a rule you can rely on.
Doesn't pushing ETTR (exposing as brightly as you can without clipping) too far hurt the inversion?
As long as the RAW doesn't clip and stays below the value your raw developer treats as white, exposing brighter costs you nothing. Things go wrong when one of the channels passes that point. That is why you check the limit in the RAW, not on the camera's display.
How these examples were measured
- Sky comparison: 5 November 2026, α7R VI, APO-LANTHAR 110mm, ISO 100, f/6.3, white balance 5500K. Auto-exposure was 1/250 s (five of six frames) and 1/320 s; the brighter exposure was 1/80 s. A colour speck is a pixel in the inverted image whose difference from the average colour around it (
ΔC*ab) is more than 5 - JPEG and RAW chart: 10 November 2026, α7R VI, CND RGB light panel (colour setting), ISO 100, f/6.3, white balance 5500K, Kodak Gold 200, lossless compressed RAW plus JPEG. Red clipping first is the result for this light and white balance; with a different light, the order can change. The RAW value is the top 0.1% of the base area. The JPEG red was already 255 at 1/500 s, and the RAW red clipped between 1/100 s and 1/80 s